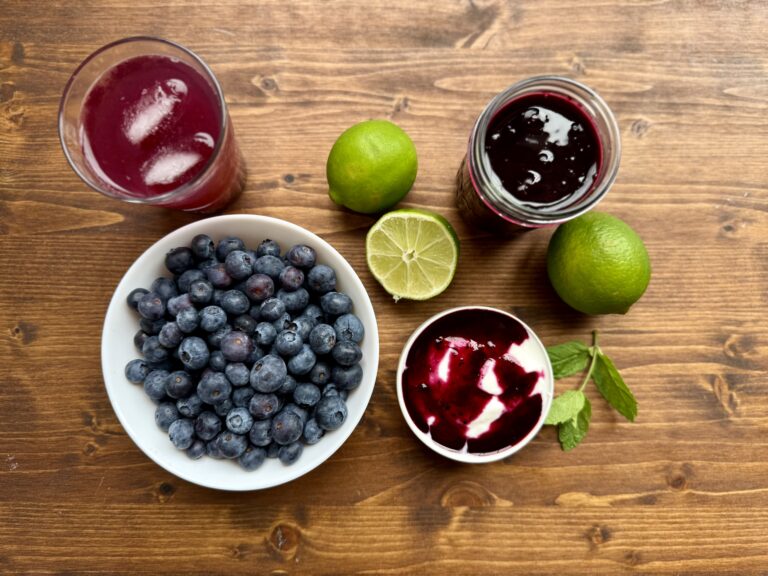
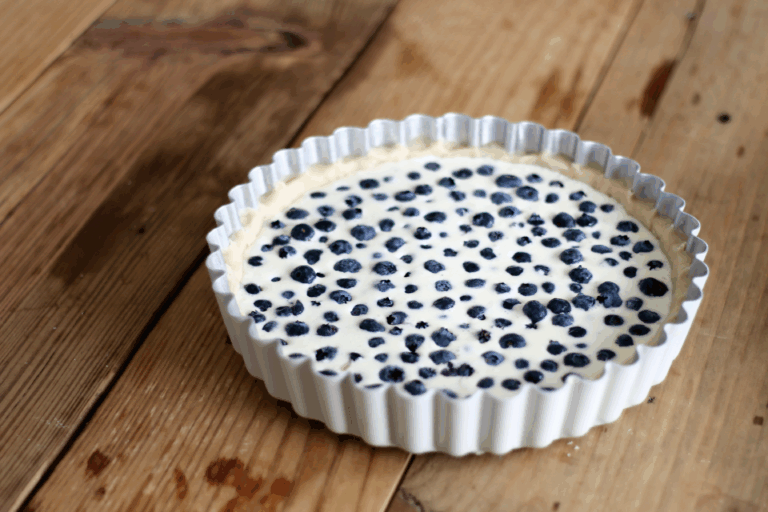
Strawberry Shortcake!

Biscuit style shortcake with strawberries and almond cream--yum!

Strawberry season is officially here! For a few weeks now my husband and I have been “sneaking” up to the patch with our boys just to snitch a few of the early berries. Do they ever taste good!

Our two-year-old delights in running up and down the rows and gobbling up anything with a hint of red and sometimes even the white ones. Our four-year-old has more refined tastes and picks the ripest ones. It’s so much fun to watch them delight in these delicious berries.

Make sure your family comes out for our first day of picking this Saturday! We open at 7a.m. for pick your own strawberries and close at 5p.m. or when we run out!

One of my favorite desserts of strawberry season is strawberry shortcake. My mom always used a boxed biscuit mix to whip up a batch of warm shortcake biscuits. My husband however, grew up on his mother’s Cottage Pudding Shortcake recipe. Both of these very different shortcakes are such tasty treats they just beg to be shared.

Since my family has chosen to cut many preservatives out of our diet I faced the dilemma of making biscuit like shortcakes like my mom’s without the box. Here’s the solution I found, I based this recipe off of my favorite biscuit recipe that I found here:

I loved the results and hopefully your family does too!

Biscuit Style Strawberry Shortcakes

Whisk together:

2 cups of all purpose flour

1 Tablespoon of baking powder

1 Teaspoon of Salt

2 Tablespoons of white sugar

Cut in with a pastry cutter:

1/3 cup of very cold butter

Seperately mix:

1 cup of milk

1/4 teaspoon of almond extract

Add milk mixture to flour mixture gradually stirring until the dough pulls away from the sides of the bowl.

Turn onto floured surface. Knead 15 times. Roll until it’s about an inch thick and cut with canning jar ring or glass. Layer the shortcakes on wax paper in a plastic container and refrigerate until you are ready to bake (these shortcakes are best when served warm!)

Bake shortcakes at 425 for 10-13 minutes or until the edges begin to brown. Careful not to over bake!

To serve, cut warm biscuits in half with a serrated knief and stuff with a dollop of whipped topping (try the almond whipped topping below) and sliced strawberries. Enjoy!

Almond Whipped Topping

1 cup of heavy cream

1 teaspoon of sugar

1 teaspoon of almond extract

Whip all the ingredients together with an electric mixer until peaks begin to form and it’s the consistency you desire.

Mom Weaver’s Cottage Pudding Shortcake

(adapted from Mennonite Community Cookbook by Mary Emma Showalter)

Cream together:

1/3 cup of butter

1 cup of sugar

Add and beat in:

2 eggs

Mix together in a separate bowl:

1 1/2 cup of flour

1/2 teaspoon of salt

2 teaspoons of baking powder

Add to egg and sugar mixture. Mix well then add:

1/2 cup of milk

2/3 teaspoon of vanilla

Stir only enough to blend ingredients together.

Pour into a greased 8×8 baking pan.

Bake at 375 for about 25 minutes. Serve with fresh strawberries and milk.

This strawberry season I hope you get a chance to enjoy these two delicious shortcakes. Don’t forget to come out and enjoy some fresh strawberry picking this Saturday! Hope to see you there!

Posted in Events on the Farm, Fruits & Vegetables, Healthy Eating, Recipes | Leave a comment

What’s YOUR Favorite Asparagus Recipe?

Our Homegrown Asparagus is in Season from April - June


It’s asparagus season! Thankfully this uniquely flavored vegetable has a pretty long season in Pennsylvania – from April to June. It seems like everyone has their favorite way of preparing asparagus, so we asked our Facebook fans how they liked to eat asparagus. Little did they know, their recipe suggestions would be featured on our blog!

Here’s what they said:

  • Grilled and brushed with homemade lemon garlic butter. – Maureen
  • Drizzle with olive oil, sea salt and fresh cracked pepper (and fresh minced garlic if desired) and oven roast at 450 for 8 to 10 minutes. – Tonya and Shelly
  • With scrambled eggs, smoked salmon and cream cheese – Tonya
  • Spritz with olive oil, garlic and onion powder, and then topped with sliced almonds, bake for 15 min. – Sara
  • White asparagus steamed or roasted w/ sauce hollandaise along with potatoes and rolled up in fried ham. – Olivia
  • Steamed with lemon pepper and shaved Parmasen cheese. – Robin

I thought I’d also weigh in with two ways I’ve enjoyed asparagus this season: pasta primavera and spring mix, strawberry and asparagus salad. Pasta primavera was the first meal I ever made for my now husband when we were dating, almost 7 years ago!

Better Homes & Garden’s Pasta Primavera

Photo courtesy of www.bhg.com

Ingredients

  • 16 thin stalks fresh asparagus
  • 8 ounces dried long fusilli or ziti pasta
  • 1 tablespoon olive oil
  • 2 teaspoons bottled minced garlic
  • 1/4 teaspoon freshly ground white pepper
  • 1/4 cup dry white wine
  • 1/4 teaspoon salt
  • 3 small red, orange, and/or yellow tomatoes, seeded and cut up
  • 1 tablespoon butter or margarine
  • 1/4 cup shredded fresh basil

Directions

1. Snap off and discard woody bases of fresh asparagus. Rinse. Cut or snap off the tips; set aside. Bias-slice asparagus stalks into 1- to 1-1/2-inch pieces; set aside.

2. Cook pasta according to package directions. Meanwhile, heat oil in a large skillet over medium heat. Add garlic and pepper; cook and stir for 30 seconds.

3. Add asparagus stalk pieces, wine, and salt to skillet. Bring to boiling; reduce heat. Cook, uncovered, for 3 minutes or until asparagus is crisp-tender, stirring occasionally. Add tomatoes and asparagus tips; cook, uncovered, for 1 minute more or until the tomatoes are heated through. Remove from heat; stir in butter.

4. Drain pasta; add pasta and basil to vegetables in skillet. Toss gently to combine. Makes 4 servings.

Take a look at the Better Homes & Garden’s website for many delicious recipe ideas!

Spring Mix Strawberry Asparagus Salad from Food.com

Photo courtesy of www.food.com

Ingredients:

  • 1 lb fresh asparagus, trimmed and cut into 1-inch pieces
  • 3 tablespoons olive oil, divided
  • 1/4 teaspoon salt
  • 1/4 teaspoon fresh coarse ground black pepper
  • 8 cups mixed baby lettuces and spring greens
  • 3 cups sliced fresh strawberries
  • 1/2 small red onion, thinly sliced
  • 1/2 cup chopped pecans, toasted
  • 2 tablespoons balsamic vinegar
  • 2 teaspoons sugar

Directions:

  1. In a bowl, toss the asparagus with 1 tablespoon oil. Spread in a single layer in a greased 15×10-inch baking pan. Sprinkle with salt and pepper.
  2. Bake at 400°F for 15-20 minutes or until tender.
  3. In a large salad bowl, toss greens, strawberries, onions, pecans and asparagus.
  4. In a small bowl, whisk the vinegar, sugar and remaining oil. Drizzle over the salad and toss to coat.

Posted in Fruits & Vegetables, Organic & Local Products, Recipes | Leave a comment

Losing Weight by Eating Real Food with the South Beach Diet

The last time I went into serious diet mode, I lost 20 pounds. After hitting that milestone, I didn’t exactly fall off the wagon. I jumped. I’d had enough of artificial food: diet soda, fat-free dressing,  imitation sour cream . . . I wanted real food.  And so I ate it–too much of it, unfortunately. After a few years, I was back where I started. I had to do something, and buying bigger clothes was not an option. But how could I lose weight without eating fake food? And how could I finally keep it off?

I shared this dilemma with a friend, who loaned me a copy of The South Beach Diet. It sat on my desk for several weeks. Finally, I knew I had to read it or return it. In order to save face, I opened it up and read a few pages. It was highly motivating. The author, Dr. Arthur Agatston, is a cardiologist who followed the diet himself, prescribed it to his patients and saw results, not only in weight loss, but also in overall health. It wasn’t just another fad diet. It was a prescription for healthy living.

Photo of Steak Au Poivre, A South Beach Recipe available here: http://www.southbeachdiet.com/sbd/publicsite/recipes/steak-au-poivre.aspx

But I have to admit, it wasn’t just the “healthiness” that hooked me.  This was the part that reeled me in:  people typically lose  8-13 pounds in the first two weeks.  Really? That was half way to my goal!  I’d have to give up carbs (including fruit) for fourteen days.  After that, I’d move from Phase 1 to Phase 2.  Then I could begin adding fruit and whole grains to my menus. So when did I have two weeks when there was no major holiday or special event to throw me off?  I looked at the calendar. Surprise! I could start on Monday.  By Easter, I would be into Phase 2.

Simply put, the diet eliminates refined carbohydrates (aka white flour and sugar) and replaces them with lean protein, low-fat dairy and “good” carbs (whole grains, vegetables and fruit).  In Phase 1, you can eat an abundance of vegetables, protein, even “healthy” fats!  Agatston actually encourages eating nuts and using olive oil. (Hooray! Real salad dressing!) It turns out those things cut down on cravings and create the sensation of fullness and satisfaction.

In order to succeed in any diet, I needed three things: motivation, a plan, and accountability. The hardest thing for me is finding the motivation.  Now that I’d found a plan, motivation was beginning to kick in. I looked over the recipes and decided what meals and snacks I would have for the first week. That meant taking a few trips to the store. Most of what I needed was available at Weavers–fresh produce, quality meats, nuts, eggs and dairy products—whole foods with no artificial ingredients.

Planning ahead is essential for me. Getting caught off-guard when I’m famished is deadly. If I know what I’m having for each meal, I stay focused on the right foods. Bringing healthy snacks with me is a lifesaver, too. And just in case you’re thinking “snacks” means little bags of celery, think again. South Beach snacks are things like pistachios, cheese sticks (delicious dipped in marinara sauce) or veggies with Laughing Cow cheese. Healthy, tasty, satisfying, even in Phase 1.

I did take exception to some of Dr. Agatston’s recommendations. For one thing, he suggests sugar-free Jello for a snack. That didn’t meet my “real food” criteria. Egg substitute wasn’t on my list either. Non-fat milk in my coffee made it taste like pond water. So I skipped the Jello, used real eggs and put half-and-half in my coffee. Thankfully, he includes the story of a man who refused to give up his daily dish of ice cream and still lost 30 pounds! It seems the diet can be adapted to individual preferences and lifestyle and still bring results.

Having motivation and a plan in motion, I still needed accountability. Dr. Agatston advises people not to count calories, but to pay attention to the kinds of food they’re eating. But even if I don’t count calories, I need to log what I’m eating. It keeps things from getting out of hand.  Sparkpeople offers a free website that simplifies this. As you enter foods, it calculates calories and nutrients. I like to know how many calories I’ve consumed so I can make the best choices each day.

Now the only thing missing was a support group. I knew if it was just me and the diet, I’d fall off the wagon as soon as I hit the first bump, and it might take years to hop back on. You’re probably wondering where I found a South Beach support group. I could have joined a group at the South Beach website .

Instead, I decided to enlist my facebook friends. They didn’t actually know I was enlisting them, but I started posting something every day about the diet. Some probably thought it was silly (the skinny ones)—but most were very encouraging. They offered helpful hints and recipes while cheering me on to my goal. It was a lot like having to weigh in for my diet group. I couldn’t embarrass myself by admitting I’d given up. Obviously, saving face is a big deal for me.

By the end of the second week, I’d lost eight pounds. After two weeks, no matter how much you’ve lost, you move to Phase 2. When you’ve reached your goal, you move to Phase 3, maintenance. It truly is a lifestyle I can live with–one that I want to live with.  Even if  (I should say when) I slip into my old ways, I can go back to Phase 1 and lose a few pounds. It really wasn’t that hard. (I was in Phase 1 when started writing this, so it’s not just a dim memory!)

Though I haven’t yet reached my goal, I am losing weight steadily. I will have to buy new summer clothes, but a smaller size this time. I have more energy, and it feels good to eat real food. My knees (which were crumbling under the strain of extra pounds) are thanking me every day. There are lots of reasons to keep eating this way.
So, if my story stirred you to action, you might want to check out the South Beach website.


You’ll find plenty of articles to get you motivated and keep you on track, as well as great recipes to try. You can also sign up for free daily emails.  And I definitely recommend reading the book. I have my own copy now, so I could loan it to you. But then, I suppose you’d have to give it back at some point…

Posted in Fruits & Vegetables, Healthy Eating, Reviews & Research, Uncategorized | Leave a comment

Orchard Fresh Breakfast Frittata

Asparagus is here! And I’m sure glad– after surviving an entire winter on frozen veggies and imported salad greens I’m thrilled to have something green, fresh, and local to eat! (Asparagus doesn’t get much more local then having it grow right in your own ” front yard” or “field”).

This veggie is so tasty I got to wondering– why not eat it for every meal?

Here is my recipe for an Asparagus Breakfast Frittata (but you can go ahead and eat it for lunch and supper too)!

Ingredients:

  • Handful of freshly harvested asparagus– Now available in our farm market! (chop it into bite sized pieces)
  • 2-3 large eggs
  • 2 Tbs of finely diced onions
  • 1-2 Tbs of olive oil
  • 2 tsp of grated Parmesan cheese
  • Dried or fresh oregano diced (optional)
  • Chives (optional)

Sauteing onions and asparagus-- doesn't get much tastier than that!

Directions:

1. Heat olive oil in a small oven proof frying pan on medium heat, add asparagus and onions. Saute until tender. Add salt and pepper to taste, sprinkle on the herbs and add Parmesan cheese stir them in a bit.

2. Crack your eggs in a separate bowl and beat with a fork, add to a small frying pan. Stir slightly to combine ingredients but then let it sit at medium heat until the bottom is set and the top is partially cooked around the edges.

3. Remove from stove top and place it in top oven rack. Broil on high until the eggs are cooked through. (Make sure you watch it cook so that it doesn’t burn!)

Finished product-- notice the slight toasting of the Parmesan cheese? That's how you know it's done!

4. Remove your frittata from the oven and let it set for a few minutes to cool a bit. Now your ready to enjoy your fresh orchard breakfast!

I recommend adding a side of homemade yogurt with fruit and a glass of freshly squeezed orange juice. Enjoy!

A great breakfast makes a great start to anyone's day!

Note: Here is a link that I’ve found with recipe for Greek Yogurt that you all might enjoy: http://www.happysimpleliving.com/2011/03/06/make-your-own-homemade-greek-yogurt/


Posted in Budget meals, Recipes | Leave a comment

Grilled Asparagus & Free-Range Steaks

After recently purchasing a box of assorted steaks, roasts and ground beef, I have embarked on an adventure to learn to prepare cuts of meat I’ve never cooked before. On Monday, between the summer-like temperatures outside and the fact that the first of Weaver’s Orchard’s asparagus had just been harvested, it seemed like the perfect time to grill some of our steaks! We made New York Strip Steak and asparagus according to the recipe below, and it was absolutely delicious.

The beef we purchased is from Lone Star Farm and is available at Weaver’s Orchard in individual cuts or in free-range meat bundle specials. Lone Star’s cattle are raised on pasture and finished on a diet of locally grown hay and whole corn silage grown at their farm. Their animals are so healthy that they never even need antibiotics or artificial growth hormones!

Restaurant-Style Steak Rub

Ingredients:

  • 1/4 cup coarse sea salt
  • 1 Tbsp. dried basil
  • 1 Tbsp. coarsely ground black pepper
  • 2-1/4 tsp. garlic powder
  • 2-1/4 tsp. onion powder
  • 1/8 tsp. cayenne pepper

Directions:

Mix all ingredients together.  Sprinkle the steak rub on the steak (a little bit goes a long way). Grill according to directions for the specific cut of meat you are cooking.

New York Strip Steak

Cooking Time: 4 rotations of 2 minutes, 8 minutes total

1. Take steak out of the fridge, rub with steak rub and allow it to sit for about 45 minutes until it has reached room temperature.

2. Preheat the grill to high. (Make sure the grill is clean!)

3. Make sure that the grill is hot enough. If it’s hot enough, you won’t be able to hold your hand more than 2 inches away from the grill for longer than 5 seconds.

4. Place the steak on the grill with tongs, being careful not to pierce the steak.

5. After 2 minutes, rotate 90 degrees (to give it grill marks).

6. In another 2 minutes, flip the steak again. (Only flip it over once!)

7. After 2 more minutes, rotate the steak 90 degrees again and grill for another 2 minutes.

8. Remove from the grill and allow the steak to rest for about 5 minutes before serving.

Find more recipes like this one at www.GrillingCompanion.com

Photo by Meg Bull

Grilled Freshly Harvested Asparagus

Ingredients:

  • 1 1/2 lb medium asparagus (24), trimmed
  • 2 tablespoons extra-virgin olive oil
  • Kosher salt

Directions:

Special equipment: 8 (6-inch) wooden skewers, soaked in warm water 10 minutes

1. Prepare grill.

2. Divide asparagus into 4 bunches. Align each bunch in a flat row and thread 2 skewers crosswise through each bunch. Brush asparagus with oil and season with kosher salt.

3. Grill asparagus on an oiled rack set 5 to 6 inches over glowing coals until tender, 3 to 5 minutes on each side.

Notes: The parallel skewers make it easier to turn the asparagus.  If outdoor grilling isn’t an option, asparagus may also be grilled in a well-seasoned ridged grill pan over moderately high heat.

Recipe courtesy of Epicurious.

Grilled Potatoes (pictured above)

This is a family favorite recipe, originally shared at a cook-out by my sister-in-law.

Ingredients:

  • 10 medium red potatoes, sliced thinly
  • 2 small onions, sliced thinly
  • 2 Tbsp. butter, cubed
  • 2 cloves garlic, minced
  • 1/4 cup shredded cheddar cheese
  • Freshly ground black pepper
  • 1-2 pieces of non-stick (or greased) aluminum foil

Directions:

1.  Arrange sliced potatoes, sliced onions and minced garlic on a sheet of greased or non-stick aluminum foil.

2. Sprinkle cheddar cheese, butter and black pepper on top of potatoes and onions.

3. Close up aluminum foil packets and grill on low heat (or move to the top rack if the grill is hot) for about 20 minutes until potatoes are lightly crispy on the bottom.

Posted in Recipes | Leave a comment

Growing Kids and Planting Trees

An exciting event that happens every year at our orchard is tree planting. Our two little guys love planting so much that if we happened to miss it, it would be like missing the 4th of July fireworks– only worse!

Watering our newly arrived trees on the truck

Every year when the new trees arrive I wonder how those “sticks” will ever grow the luscious branches that produce juicy fruit! But somehow they always do end up growing and survive even the rough handling of our boy’s helping hands!

Our four-year-old just couldn't wait to get started "helping" dad plant those trees!

This spring our boys are older and able to “help” out a little more, instead of getting in the way. Through watching them, I’ve begun to appreciate all the benefits that growing up on an orchard will mean for their future. They are learning so many things at a young age– how plants grow, how to care for the soil and best of all, that work can be so fun it’s hard to tell that it’s not play!

If it were up to him-- he'd sit on that tractor all day long!

Through living on a multi-generation orchard, my boys are learning invaluable social skills. Whether it be through telling great grandpa Allen about their day, checking bug traps with grandpa Ed or giving their uncle Eric a piece of their mind about how things should be done, the relationships they are building are sure to impact their lives and worldview in the future!

Our four-year-old giving uncle Eric his two cents on how far apart the trees should be spaced.

It’s not every kid that gets to spend a whole afternoon working with their dad on the job!

Daddy got lots of help planting trees this year!

As my boys learn new things about the orchard and get an opportunity to “help,” I see them blossom with a sense of accomplishment and pride. Especially our two year old! Even though he doesn’t talk much yet, his big grin as he places the trees in the holes says everything– “look what I can do mom! I’m a big boy too!”

Even our two-year-old knows how to plant a tree!

I apologize if my reminiscing is making you jealous to live on an orchard! It really is great– and that’s part of the experiences we hope to share with our customers every time you come for a visit. It’s my hope that every time you and your family come to pick fresh fruit, feed our goats, or visit our farm market, you will get a taste of what it’s like to be on a family orchard and all the experiences that entails!

Working or playing? When you live on an orchard the line becomes shady!

As spring planting finishes up, I’m looking forward to the new growing season! I can’t wait to bite into a ripe juicy strawberry and smell the peaches ripening on the trees– I hope you can come and join us too and build some family memories of your own! See you soon!

The finishing touch-- stomping the dirt around the tree!

Posted in Life on the Farm | Comments Off

Easter Egg Hunts at the Orchard


One little Weaver helping to fill Easter eggs!

Spring has sprung a bit early this year and many of our trees are already blooming! We’re frantically preparing for our Easter festivities coming up on April 6th and 7th from 11am- 2pm. Our oldest son has even joined in on the fun of getting the Easter eggs ready! Our Easter egg hunt is a great time with plenty of activities for kids of all ages.

Easter eggs are so much fun! We hope you can join us!

During the event, kids will get to:

  • Hunt for Easter eggs filled with candy and prizes!
  • Listen to a children’s story
  • Pose for a photo with the Easter Bunny
  • Play Easter egg bocce ball
  • Meet and greet Posy the Clown
  • Hop along in sack races
  • Get their face painted
  • Visit with the baby animals

We’re also planning to have hayrides through the blossoming orchard as long as the weather permits.

Delicious homemade food specialties will also be available including our very own Easter egg rolls and cider donuts! The egg rolls are being sold as a fundraiser for Christian missions work that is being done in Thailand.

A wide array of Easter flowers will also be available in our garden center.

For more information visit our website or call us at (610) 856-7300.

Happy Easter! We hope to see you there!

Posted in Events on the Farm, Holiday Planning & Meals | Comments Off

Winter Happenings at the Orchard

My husband often gets asked what what we do around the orchard all winter long. It seems a common misconception is that all fruit growers hibernate with the groundhogs during the winter. Well maybe some do– but not on our orchard!

While our working days are shorter due to the climate and brief daylight hours, there is no shortage of activity around our farm market and orchard!

Winter provides the perfect time to catch up on repairs on the tractors and other equipment to keep our busy season running smoothly.

Our youngest son runs down the row of peach trees his daddy is pruning.

Pruning is also a never ending task in the cold months– preparing the trees to bear the best fruit possible takes quite a bit of tedious time and effort.

While out in the orchard this week I got a sneak peak at a small peach blossom beginning to open ever so slightly. We don’t want the blossoms to open just yet! We need some colder weather to get them through to the end of April when they can safely bloom all they want!

A teeny tiny blossom in my hand, if you look closely you can see the pink that will become the flower.


Late winter and early spring is the time of year when we begin to put the plastic on our high tunnels. I watched the guys pull the plastic on the tunnel one morning last week. It’s quite a job, but they got it done!

For now, the strawberry plants continue to hibernate under their blanket of straw but before we know it it will be time to rake off the straw and let the strawberries grow! (My boys and I can’t wait to taste some of those sweet juicy red berries!)

High tunnel over the strawberries and a straw covering the berries outside the tunnel

It has been a good, busy winter so far and I can’t believe it’s almost over! (I’m personally praying for one more big snowfall before the season ends— then let spring begin!) I think my boys would love to see it snow as well– but they’ll take any amount they can get. Like any fruit grower they make the best of what each season brings– here’s a picture of them taking advantage of the scant snow this winter!

Making the best of a snow-less winter!


Posted in Life on the Farm | Comments Off

Garden Harvest Slaw Wrap


I’ve been craving raw vegetables this winter, and sometimes traditional leafy green salads get a little bit boring. Plus, I’m always trying to work herbs like parsley and dark green vegetables like kale into my diet. So I adapted this recipe from a recipe shared by one of our teachers during one of our cooking classes this past summer. This wrap was so good that I even ate it for breakfast! Be warned though that the beets are very juicy and their juice can stain. It’s probably not a good idea to eat it while wearing your favorite white shirt!

Ingredients:

  • 3/4 cup beets
  • 3/4 cup carrots
  • 3/4 cup turnips
  • 3/4 cup kohlrabi
  • 3/4 cup kale
  • 3/4 cup parsley
  • 1 small onion
  • Italian dressing. Recommended: Simply Organic Italian dressing packet with olive oil & balsamic vinegar
  • Cream cheese
  • Whole wheat wraps

Directions:

  1. Grate all ingredients with a cheese grater or in the food processor.
  2. Mix in Italian dressing.
  3. Spread cream cheese lightly over the entire tortilla.
  4. Scoop the garden harvest slaw into the center of the tortilla.
  5. Fold the back 1/4 of the tortilla and then roll it into thirds, as pictured above.


Posted in Fruits & Vegetables, Recipes | Comments Off

The Effects of a Mild Winter on Our Crops

Photo of our orchard from a previous snow storm


This morning at Weaver’s Orchard, the early morning sun is glistening off the snow covered trees and fields.  Once again, we’re reminded that we are in the winter season – the time of year that our trees and plants need to reach the required number of dormant days so they are again ready to produce fruit.

We have had many customers asking if the mild temperatures are harmful to the trees and plants. The temperatures many of us have been enjoying do not cause damage in any way to the trees, but what it does do is start the flow of sap up into the tree and trigger the swelling of buds that grow into blossoms.

If this process starts too early then the buds and blossoms are more vulnerable to cold temperatures that can kill them, leaving us with no fruit. If the spring season comes early without abnormally low temperatures, then we will have fruit and we will all be happy!

As always, the late winter and spring season is a risky stressful time for us.  For our strawberries, we can protect them with floating row covers and irrigation, but there is little we can do to provide protection for our trees from frost.   For now – we will enjoy the mild temperatures!


Posted in Life on the Farm, Organic & Local Products | Comments Off