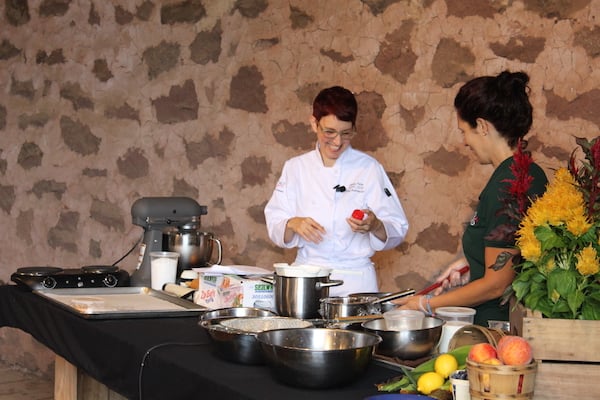
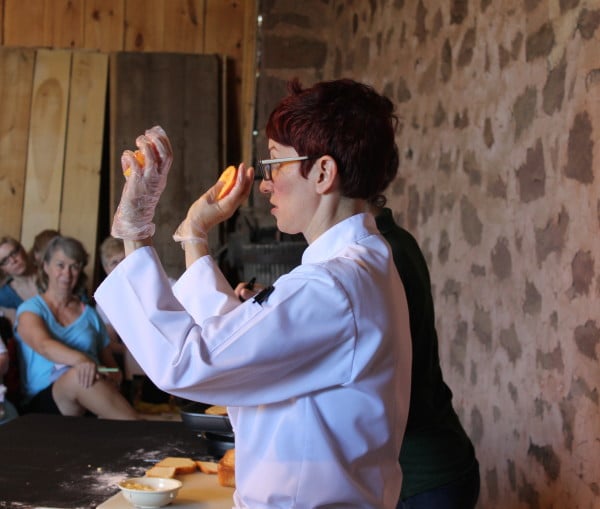
“Baking asks you to think,” says Pastry Chef Instructor Diana Penn, CEPC, CCE who led a Weaver’s Orchard cooking class this Tuesday, teaching participants to make blueberry crostata with sweet corn ice cream and grilled pound cake with no-churn peach ice cream. Each of these desserts sounds impressive, yet Diana had one main message to convey about each of them: “Know what the end goal is.” If you want your desserts to turn out well, you have to go beyond reading the recipe, she says. You have to envision how you want the final product to turn out. And to get it to turn out that way, you have to know your ingredients.
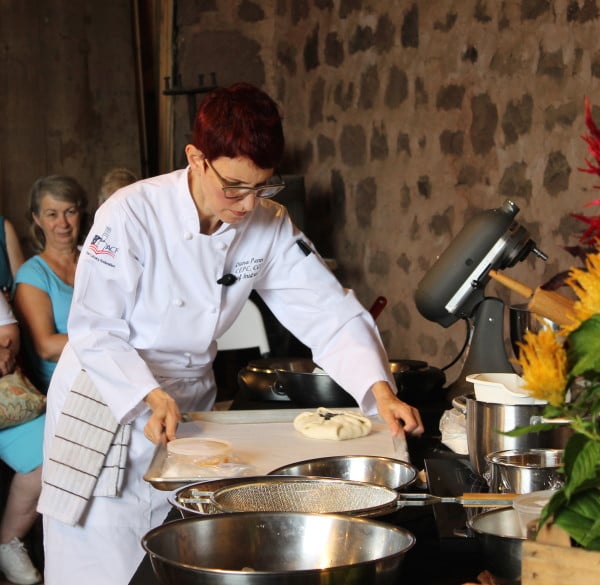
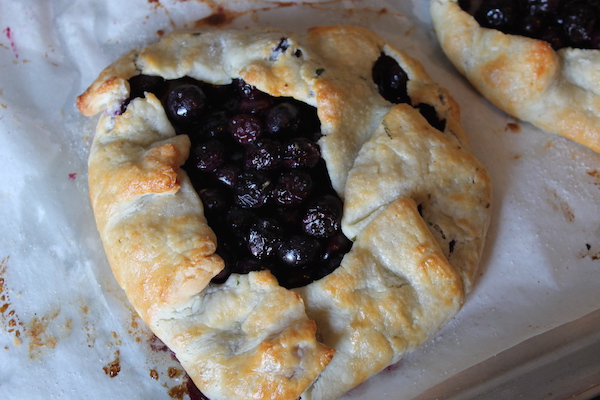
As she demonstrated the crostata–a flaky, rustic Italian free-form tart– Diana stressed “maintaining the integrity of the fruit.” Even though home bakers often find the crust stressful, Diana says it’s important to remember that the crust is a vehicle. It is there to “add some luxury” to the fruit.
For pies and tarts, it is tricky to have all of the ingredients turn out well, so you have to understand each of them. You have to know, for instance, that fruit will boil at 212 degrees F, and work with that knowledge as you strive for a thoroughly baked crust. It’s essential to “bake the crust without incinerating the fruit,” says Diana. For the crostata she made on Tuesday, the pastry chef instructor macerated the berries with lemon juice, sugar, lemon zest and tarragon, and then baked the crostata. She mentioned that you can also chill the fruit before baking it.
Cream Cheese Crostata Dough
Crostata: Rustic/Italian tart made with pasta frolla, “tender dough”; open tart.
Ingredients
- 3 sticks + 2.5 tablespoons (13.25 oz.) Butter
- ¼ tsp. salt
- Lemon Zest
- 2 pkgs. (1 lb.) cream cheese
- 4 c. (1 lb.) pastry flour
Instructions
- Paddle butter, salt & (flavoring) for 1-2 minutes ON MEDIUM SPEED until pliable & softened.
- Decrease mixer speed to LOW.
- (CAUTION) with mixer running, add cream cheese in pieces.
- Mix to combine, 1-2 minutes on low. Turn mixer off & Scrape well.
- Add flour to butter/cream cheese mixture.
- Mix on LOW for 1-2 minutes until combined, scraping in between if needed.
- Divide dough into pieces. Wrap and refrigerate for at least 30 minutes before use.
To Assemble Crostata: - STEP 1: Scale, mix & chill dough.
- STEP 2: Infuse complimentary flavors to fruit.
- Macerate fruit in desired flavoring liquid (orange juice, liquor, sangria) (Macerated: to soak product, usually fruit, in a flavored liquid, usually alcohol, to soften +/or infuse flavor.)
- **NOTE: Lemon juice boosts fruit flavors!
- Add fresh chopped herbs/spices/zest.
- Sprinkle granulated sugar.
- Toss to coat.
- Set aside 10-15 minutes.
- Step 3: Roll, Fill & Décor Crostata
- Dust the work bench with flour (be generous!).
- “Wake up your dough” –(see demo) by gently beating it with your rolling pin.
- Roll to desired diameter and thickness. 1/8-1/4” thickness. The larger the diameter, the thicker the dough should progress.
- Place macerated fruit into center of the dough. Fold up edges around the fruit by building a border crust.
- Brush border crust with egg wash. (Egg Wash: baker’s décor/glaze made of any variety of eggs, water/cream, & salt brushed on before baking to enhance color & shine)
- Sprinkle with sugar.
- Bake: 365F until dough is golden and fruit just starts to bubble.
To complement the crostata, Diana made sweet corn ice cream. Here and there, at especially hip ice cream parlors, you will find this unusual ice cream flavor, but Diana was ahead of this food trend. She was making it and serving it with crostata six years ago when she worked in a restaurant. Corn is so sweet, she laughs, “it belongs to me” with all of the other sweet foods that belong to the bakers. Diana likes “crossover” vegetables. You can make carrot cake, she told me. And zucchini bread. Why not sweet corn ice cream?
Sweet corn ice cream is valuable not just for its flavor but for its frugality. You can use leftover corn on the cob, either grilled or steamed. For Tuesday’s class, Diana made one batch with grilled corn, one steamed. She steeped both in milk.
PrintSweet Corn Crème Anglaise
(Crème Anglaise / Vanilla Sauce: French Custard sauce; base for many pastry components.)
Ingredients
- ¾ c. (12 Tablespoons / 6 oz.)Sugar, divided
- 9 oz. Egg Yolks
- 1 tsp. Vanilla Extract
- 3 c. (24 fl. Oz.) Milk
- 1–2 ears Fresh Corn
Instructions
- Remove corn kernels from cob.
- Bring corn and milk to a boil. Turn off heat and steep for 15 minutes.
- Blend together and fine strain. Discard solids.
- Combine ½ sugar, milk, and vanilla extract in heavy saucepan. Scald over low heat. (Scald: Steaming; just before the boil, 180F)
- Remove from heat.
- In a bowl whisk together egg yolks and the other ½ sugar.
- Create a liason by tempering 1/3 of the warm milk mixture into the egg/sugar mixture. (Liason: the middle man; a mixture created to safely introduce one ingredient to another.) (Temper: to bring a product to “optimum” or usable temperature.)
- Pour the mixture back into the saucepan and heat over LOW heat until 175-180F. STIRRING OFTEN & “Figure 8”.
- Strain through Chinois into prepared ice bath. (Ice Bath: see demo)
- Cool below 41F ASAP (at least 12 hours minimum for ice cream).
If you’re looking for another reason to justify the extra work involved in making homemade ice cream (beyond the incredible flavor and the frugal use of leftover corn), Diana has reasons aplenty.
Making homemade ice cream gets you going to the farmer, she says, asking “what kind of cream is this?” She hopes that if people make their own ice cream, “it will bring back the milkman.” She delights in seeing older traditions returning. Mills, for instance, are coming back as people become concerned about the quality of their flour.
“This is the time when things are starting to change,” she says. Consumers are becoming more educated about food, and when it comes to traditional processed foods, “people are done,” she says.
When you make your own ice cream, she adds, you can control how much sugar is in it. Have you noticed that when you look at nutrition labeling on the carton of ice cream, you will not see a percent daily value listed for sugar? And that sugar content is listed in grams? Diana urges people to convert the gram amount to teaspoons. Four grams equals one teaspoon, so that means ice cream with 20 grams of sugar per half-cup serving contains five teaspoons of sugar!
When you make ice cream at home, says Diana, you have “power to control your food destiny.” When you adopt a farm-to-table lifestyle, you become your own artisan. You can make that no-churn peach ice cream with peaches you picked yourself, with your kids or grandkids.
And speaking of no-churn peach ice cream, here is Diana’s recipe. It uses just four simple ingredients–peaches, sour cream, sugar and lemon juice–and blends them in a regular food processor. When she first explored this recipe, she said it was “crazily too easy.”

Peach Sour Cream “No-Churn” Ice Cream
Ingredients
- 2–3 Medium Peaches (14 oz.)
- 2 Tablespoons Lemon Juice
- ¾ c. + 2 Tablespoons (7 oz.) Granulated Sugar
- 2 c. (16 oz.) Sour Cream
Instructions
- Peel, remove pits and cut peaches into cubes.
- Place peaches and lemon juice into food processor. Puree until fairly smooth.
- Add sugar and sour cream. Pulse to mix.
- Scrape into a shallow pan. FREEZE.
- After frozen, break into small chunks with a fork and process AGAIN until entire mixture is smooth.
- Freeze at least 3 hours.
- Remove from freezer to cooler for 30 minutes to soften before serving.
- Serve within 2-3 days.
Peach Pound Cake
Plate as desired. Serve with Ice Cream or Peach-Sour Cream No Churn Ice-Cream
Ingredients
- 1 stick (8 oz.) butter at room temperature
- 1 c. + 2 tablespoons granulated sugar
- ¼ teaspoon salt
- 4 eggs at room temperature
- 1 teaspoon lemon or vanilla extract
- 2 c. (8 oz.) cake flour, sifted
Instructions
- With Paddle attachment, cream together butter, sugar & salt, on MEDIUM SPEED for 3-4 minutes until light.
- Stop. Drop the bowl & scrape well!
- Whisk together eggs and extract.
- With mixer on LOW, add in eggs gradually. (Stop & scrape ½ way).
- Stop & scrape bowl after eggs are completely incorporated.
- Add/sift in flour all of the flour.
- Mix on low until flour is incorporated. Scrape bowl and paddle again.
- Pour batter into prepared loaf pan.
- Bake: 325F/Standard oven for 60-75 minutes.
- To Assemble Grilled Pound Cake and Peaches
- STEP 1: Bake & cool pound cake.
- STEP 2: Slice peaches in half, remove pit. Reserve.
- STEP 3: GRILL Pound Cake & Peaches
- Slice cooled pound cake into equal portions with serrated knife.
- Brush each pound cake slice generously with softened butter.
- Grill butter side down 2 minutes, then move to create cross-hatch.
- Brush top of pound cake slices with butter.
- Flip pound cake and repeat.
- Remove from heat onto cutting board or plate.
- Brush peach halves with butter and grill to heat.
- REPEAT steps **same as pound cake**
As you make these desserts at home, keep the end goal in mind: the integrity of the fruit, the creaminess of the ice cream. And as you reach for that goal, know your ingredients and pay attention to each step. “It’s all about the quality of the details,” says Diana. For help with all of those details, Diana invites you to follow her on Facebook at Bakeology 101 and Twitter @GeekPastry.